
See the attached link for a printable recipe card for our Tuna Cakes!

Today I share with you an old family recipe. I have been eating these tuna cakes pretty much my whole life and as an adult are one my favorite fast and inexpensive meals to make. It’s essentially the same idea as making a crab cake in construction, but uses ingredients I think most people tend to have most of the time. All you need is:
1 can of chunk light tuna
10 Saltines
1 Egg
And this will make 3 average size tuna cakes, which is what I would normally eat myself, so multiple the recipe as you need.
First, open the tuna and drain the water. Put tuna in a medium size bowl and mix it up a little to break up any big pieces.
Then add your egg and thoroughly mix it in to the tuna. Sure you could properly scramble this in another bowl, but that’s just extra time and another dish to clean, so just throw in there. Everything will work out fine.
Next, crunch up your saltines and mix them in as well. I never seem to get mine quite crunched up enough, so I end up crunching them more with my fork in the bowl. So what you want to end up should look something like this.

Whilst doing this you want to get your skillet ready. You can use oil, butter, or cooking spray. Any will work fine, but you don’t want to much or else they’ll be too greasy, so I usually go with the cooking spray. Set to medium to medium high.
Now, it’s time to get your hands dirty! Take your mixture and make a palm size patty. Here’s the size of mine.

Place in skillet and cook until a golden brown. I usually will squish mine down a little after they’re in the skillet, so there is more crispy outside to soft inside, but that is just my preference. They should take about 3-5 minutes per side. Adjust your heat if they’re getting browned to fast.

And voila! Salt and pepper them and now you have a quick lunch or dinner. Sure, you could add some onion or other things to the mix, but if you have at least those 3 things, you have enough to make something! You could serve them with the side of your choice, but honestly I just end up eating them by themselves a lot of times.

For a printable recipe card for this dish, click here!
I hope you all enjoy them and would love to hear any feedback you have!
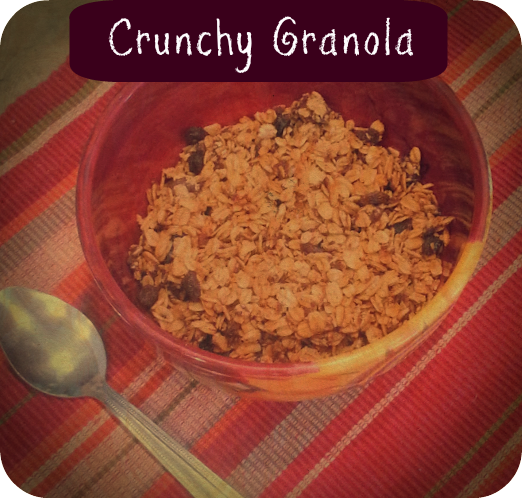
Click link below for printable recipe card for our Crunchy Granola Recipe!
Ten years ago, I was totally a mainstream person and would have laughed at anyone who told me I would such a hippie now. Homeschooling mom, breastfeeding advocate, holistic health care believer, GMO fighter, whole food eating, home birthing, cloth diapering and now even granola. Now, I know plenty of people out there a lot more crunchier then I, so I really consider myself sorta crunchy. I’m headed that direction but won’t beat myself up if I get fast food every once in awhile.
I started out this way just to save money. I wanted to stay at home with my kids so we cut everything back, way back. Then it became a game. How much more could I save? This all came in very handy when my husband lost his job a few years ago.
One of the 1st things I learned to make homemade was bread and granola. We go through a ton of both in this house. Cereal is about $5 a box, loaded with a bunch of junk, and only lasts a couple of days here if we’re lucky. I have tried many, many different types of granola over the years, but I have finally found one that is perfect for us.
Without further ado, here it is;

Ingredients:
10 cups old fashioned and/or steel cut oats (I like to use a combo)
1 cup unsweetened coconut flakes
1 1/2 cups of nuts and/or seeds (sunflower seeds, almonds, pecans, etc.)
1/2 cup hemp seeds
1/4 cup chia seeds
1/2 cup ground flax seeds
1 cup chocolate chips ( yeah I know that’s a giant bag. You should see the size of my M&M bag in the freezer, see kinda crunchy.)
1/2 tsp salt
2 Tbsp cinnamon
1/2 cup coconut oil
1 1/2 cups maple syrup or agave nectar
2 Tbsp Vanilla extract
1 Tbsp almond extract
Optional : 1/ 1/2 cups dried fruit (ie raisins or dried cranberries) for after baking.
Step 1) Preheat oven to 250 degrees.

Step 2) Stir together the dry ingredients (oats, seeds, nuts,coconut flakes, salt, cinnamon, and chocolate chips.) except the dried fruit.

My kids don’t like biting into the nuts and seeds so I hide them in there by chopping them up 1st. They have no clue!

Step 3) Warm the coconut oil. Coconut oil is a solid below 76 degrees so you will need to warm it if it is solid either on the stove or in the microwave for a couple of seconds. I use this stuff for everything from cooking oil to lotion.

Step 4) In a separate bowl, whisk together the oil, maple syrup, and the extracts until it becomes a smooth syrup.
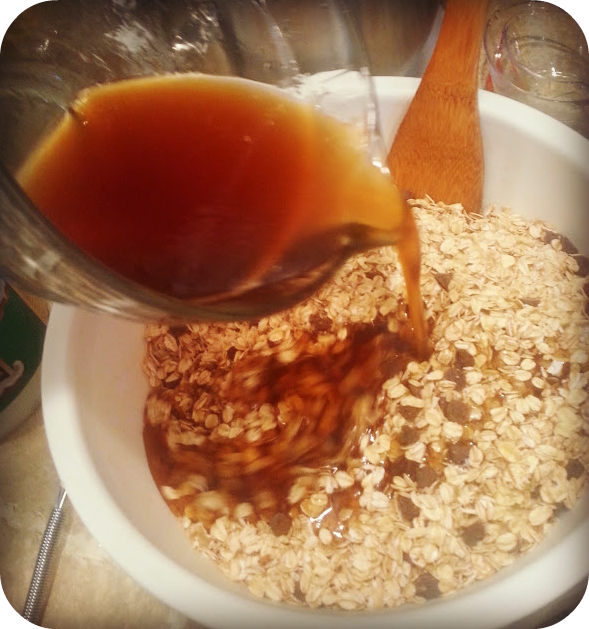
Step 5) Add syrup to dried ingredients. Stir until everything is coated evenly.

Step 6) Either grease or cover in parchment paper, 2 18×13 in pans. I prefer to parchment paper on my stones. It makes clean up really easy.

Step 7) Pour the granola onto the pans making sure to spread out evenly.

Step 8) Put the pans in the oven for 90 mins making sure to stir every 30 mins. After 90 mins, turn off the oven and leave the granola in for up to 4 hours. This gives it its crunchiness. Once out of the oven and cool, you can now add the raisins or died fruit. If you add it before you will have exploding fruit!

There you have it, homemade Granola! This usually lasts us about 2 weeks ( it can last upto 3 weeks in a sealed container). Granola is a lot heavier then regular cereal so we only eat about 1/2 cup of it mixed with either milk or yogurt and we don’t get as hungry as fast. I usually make a batch of this on Sunday morning while making a double batch of pancakes ( we freeze the other batch to have later in the week.), so we call Sunday morning breakfast day. lol
For a printable recipe card for this granola recipe, click here!
The great thing with granola is that you can sub what you have on hand or mix up flavors such as dried apples and apple pie spices. Make it your own!
What is your favorite thing to add granola too?
 I recently did a little rearranging at my house. Before Paul and I were married, I lived with roommates. We were very fortunate to be given the living room furniture that belonged to my roommate when I moved out, which included a sofa and chaise lounge. We also made a purchase at IKEA (the happiest place on earth for grown ups!), we purchased the Solsta Sofa Bed. Partly for future functionality… its also one of the least expensive sofas they sell. But, honestly we loved it and it was the perfect size for us- don’t you love when low prices and practicality come together! So back to the reason you’ve read this far… We unfortunately decided to put the chaise lounge out to pasture. It had seen it had seen better days, and lets be honest, most of those days were Pre-Tango, who freaked out and chewed of some of the upholstery… Continue reading

A little bit ago I would ask the kids to set the table and they were done after only putting down a plate. They obviously had no clue how to set a table. I would tell them over and over again but it didn’t stick. I of course consulted Pinterest to find an answer.
There were printables that were to tiny for our place settings or they had beautiful sewn ones that I almost talked myself into doing. Then I realized it would be forever before I could get the fabric, find my sewing machine, watch a Youtube video on how to sew, let alone actually make it. It would end up in my pile of Pinterest projects that may never happen.
Anyone else have one of those piles?
Then I had an idea! I have tons of scrapbook paper from scrapbooking projects that never happened (notice a theme?), so instead of fabric, I used pretty paper!
I dug through my giant bag and found a bunch of coordinating paper. It even had letters that I could use to put their names on their own placemats! Perfect!
 See the link to this PDF printable from the Orange Blossoms and Sunshine Kitchen!

First things first as a new reader to what will be an obviously awesome blog (modesty is most definitely lost on me.) I LOVE breakfast. Not just love, of the I eat it everyday and it nourishes me variety. I mean this is a serious love affair. I would eat breakfast food anytime of day everyday of the week for the rest of my life. Chicken and waffles was truly inspired creating and is a gift to mankind straight from God above. Any food can be improved by adding an egg to it. Any favorite restaurant that serves breakfast all day long gets bonus points in my book (i.e. Cracker Barrel, Bojangles, various local mom and pops.) So, now that you know that about me, lets get to our task at hand.
Blueberry Stuffed French Toast. This idea came to me on a beautiful Saturday morning shortly after Jenny (my blogging co-collaborator) gave me a jar of homemade blueberry jam/preserves. Jenny had went and picked the blueberries and made and canned the jam herself.

We recently moved and found ourselves with a usable backyard. We haven’t had one of those for a couple of years and the 1st thing I wanted to do was start a garden. Of course this being me, it needed to be practical so a vegetable garden was my 1st choice.
A very generous friend of mine gave us a couple of pallets, so here was my chance to make a raised bed garden with minimal work! I already started a few plants from seed in a seed starter so it was pretty easy to transfer them over. Here are the steps we took;
 As a relatively new user of cast iron, I felt daunted. From cooks using cast iron, I couldn’t hear enough good things about them. So, I registered for a cast iron skillet and grill pan for my wedding and was lucky enough to receive both! Both of mine are Lodge, which tends to be the most common brand, if you are looking to purchase. I have used both and these are the things I have learned thus far.

